Showing posts with label vegetarian. Show all posts

Monday, January 18, 2010

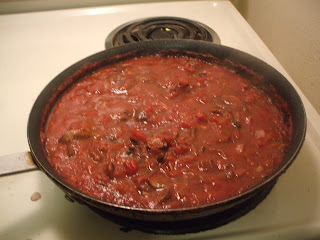
Yin-Yang Pasta: Red and White Wine Sauces


Howdy, and a happy MLK day to all! (I attempted to contrive some sort of segue from that into talking about the food, but it sounded too stupid to even come off as ironic, so I say again unto you, happy MLK day, and I'll leave it at that!)

Today I bring to you two twin recipes, born of the same stock (that is, my brain), which shall... I entirely forgot where I was going with that sentence. In fact, almost everything I've tried to type in the way of an introduction I've just deleted immediately afterward. The little people managing my brain would like to apologize for the lack of coherence, and assure you my ability to communicate will be restored shortly.

In the meantime, here are the recipes.

Red and White Wine Pasta Sauces

Ingredients:
Both:
1 lb pasta (I used mostaccioli for the red and lemon pepper papardelle for the white)
olive oil
1/2 an onion, diced (I used red for the red and white for the white :) )
10-15 mushrooms, sliced
4 cloves garlic, minced
salt
pepper
basil and oregano


Red:
1/3 cup red wine of your choice
1 28 ounce can of crushed tomatoes
1 healthy glug of balsamic vinegar

White:
1/3 cup white wine of your choice
1/4 cup olive oil
1 green pepper, diced
1 large tomato, diced


Music Listened To:
I don't actually remember what it was, but there is indeed a strong chance that it was my new Liz Carroll album entitled... Liz Carroll! On a side note, I have recently met the guitarist on that album, Dáithí Sproule over at the Session at Merlin's Rest, which was rather exciting. But, I digress...

Procedure:

1. Prepare the mushrooms: heat some olive oil in a skillet over high heat. You know, all of us have a different method of testing to see when the oil is ready. Emily's method involves putting in a little bit of the garlic and waiting for it to sizzle. Mine involves flicking water onto the oil and seeing if you hear a pop and sizzle. Bozzie's involves... I'm rambling again, aren't I?

When the oil is ready, add the mushrooms and begin sauteing over high heat. Add about a clove of the garlic, a pinch of basil and oregano and, lastly, a splash of the wine. Heat until the mushrooms drink up some of the wine. Set aside.


2. Do them onions: Heat some more olive oil in the skillet. You know, all of us have a different... (kidding!) Saute the onions over low heat. Be patient - the best results come if they are cooked slowly. If you're doing the red wine sauce, go for about 5 minutes. If white, more like 10, since you're aiming for a generally sweeter taste. Gesture dramatically as the aromas arise.


3. Combine stuff: Add the remaining garlic and wine. For the red wine sauce, dump in the tomatoes, bring to a boil, turn down to a simmer and add the vinegar and other seasonings. For the white, add the remaining olive oil and seasonings and similarly get simmering. Nice slow cooking. Oh yeah, if you haven't already, boil the pasta. Generally you want your sauce simmering about the same amount of time you have the pasta boiling.

4. About 3-5 minutes from the end, add the tomato and green pepper if you're making the white wine sauce. Stir the sauce constantly either way. This is a good time to taste and adjust the flavors as desired. I cannot argue with adding more garlic if not garlicky enough or adding more vinegar if the red sauce isn't tangy enough.


And that's pretty much it. Add to the pasta and serve with a glass of wine! My housemates gobbled these up, and the smell is pretty great while its cooking. I'd have to say my personal preference is for the red wine sauce due to the complexity of flavor you get from the red wine, but both are definitely quality Yummies. My rambliness seems to have calmed down for the time being, although a bit too late for you all. Sorry!

Friday, December 18, 2009

Aerarbran Stew


Hello denizens of the internet! My post of a na latha (of the day anns a Ghaidhlig, which I am speaking in for no good reason) is a little bit dorky. Today, I bring you the best in regional foods of regions that don't exist!

Perhaps I should explain myself. Here at Yummies Kitchen, we do more than just cook. All three of us are also writers of fiction, and all of our works deal with fictional cultures. The other day, a thought struck us: what do they eat in these places? And then we decided to answer that question by cooking their food!

The culture I was exploring that created this dish is based in a forest with flora and fauna greatly resembling the North Woods. That means there were such things as edible roots, cherries, wild rice and mushrooms, which is exactly what I decided to make this dish out of. Exactly half of us were skeptical of combining these things (Emily and half of me) and the other half were really enthusiastic about it (Bozzie and the other half of me). It actually turned out better than I could have hoped, and the results caused Emily to say "I never would have thought it, but this turned out really well!"

Aerarbran Stew with Cherries and Wild Rice

Ingredients
3 cloves garlic
1 white onion
1 turnip
1 large potato
5 mushrooms
2/3 cup wild rice
1/2 cup rice
2/3 cup dried sour cherries
2 cups Veggie broth
1 tbs butter
salt and pepper

Materials
Knife and Cutting board
Medium-large skillet
Lid that fits over skillet
Wooden Spoon

Music Listened To
Amal and the Night Visitors was playing on MPR, I believe

1. Chop the onion and garlic. Peel the turnip and cube both the turnip and the potato. Slice the mushrooms.

2. Sautee the garlic and onions over low-med heat until translucent. They should taste generally sweet before proceeding.

3. Add turnip and potato. Add the broth, rice, wild rice, salt and pepper. Bring to a boil and simmer 5-10 minutes.

4. Add the cherries and mushrooms. Simmer 10-15 minutes, until the rice is soft enough to eat.


It's really quite a simple recipe, when it comes down to it, but it turned out delicious. It can work either as a main course, or you could have it alongside other dishes. Perhaps you may want to try it for your Christmas dinner, side by side with your favorite savories (or your fave saves as I have just decided I like to call them).

And, as is our philosophy at Yummies!, don't just do it by the book! Improvise a little! I was thinking that next time I'd try to get some wild mushrooms instead of button or crimini. Maybe you're more carnivorous than me, so try putting some white meat in it! Or maybe a splash or white wine? The choice is yours!

We now close with the prayer of thanks I came up with on the bus knowing one would be required:

We thank the forest
We thank the earth
for our food
and for our birth.

Saturday, December 12, 2009

Spinach and Mushroom Alfredo


So, quick post this week. Is this week's recipe extremely inventive? Not so much. Is it delicious, warm, filling and easy to make? Why, yes! Glad you asked!
I (Iain) first prepared this dish on the fly when cooking for a large group and someone else had already procured the ingredients. I just followed my cooking instincts and put together the ingredients I thought sounded good, and the result was deemed "orgasmic" in the words of one of the eaters. After getting such a good reception for it that first time I've gone on to prepare it several more times since, and it never fails for a good dinner in not a lot of time.

Spinach and Mushroom Alfredo

Ingredients
1 lb fettuccine
1 cup heavy cream
1 stick of butter
1 cup Parmesan
salt and pepper
15-20 mushrooms
4 medium-large cloves garlic, minced
3 hefty handfuls of spinach
butter for sauteing

Materials
Knife and Cutting Board
Skillet
Large pot
Wooden spoon
Tongs

Music Listened To
"Dublin Lady" by Andy M Stewart

1. Bring the water to a boil and add the fettuccine. In the meantime, slice your mushrooms and mince your garlic. Heat the skillet with some butter (don't go too skimpy - if you're making this dish, throw your fat content worries to the wind). Saute the mushrooms with most of the garlic - I usually add some basil to this step.

2. Once the pasta is done, drain it (promptly!) and throw in the butter, cream and Parmesan. Add the remaining garlic, salt and pepper. Stir together over low heat and turn off once combined. In the meantime, add the spinach to the mushrooms and stir until the spinach is cooked down.

3. Dump the spinach and mushrooms into the pasta and suace. Stir together with tongs and serve!

Pretty simple, eh? Despite my previous comment, if you DO want to make the dish less heavy, saute the mushrooms in a little olive oil instead (it'll go farther than the butter) and sub milk in for the heavy cream. You can also cut down on the butter in the sauce. It won't be quite as delicious, but it should still taste good and it won't be quite so much of a heavyweight. I personally like the heaviness of it now that it's winter and it takes probably twice as much food to fill me up, but I also, as has been observed, am a black hole when it comes to food.

Enjoy!

Wednesday, December 2, 2009

Vegetarian Haggis

Half of you just said "Vegetarian WHAT???"
The other half of you just said "Wait, WHAT kind of Haggis???"
This is a dish that never fails to get an amusing reaction from first-timers when they hear about it. Two of my favorites have been:
"Wouldn't that just be oatmeal?"
and
"I would be honored to eat such an oxymoronic dish!"

Silly reactions aside, this is an original Iain recipe that I first developed a couple years ago, and since has become an all-time favorite. When I studied for a semester at the University of Edinburgh, the President of the University gave us a greeting speech, in which he gave us a list of imperatives for our time in Edinburgh. Among the more traditional ones such as "study hard" were "go to a ceilidh," "climb Arthur's Seat," and "eat haggis - even the vegetarian varieties have become very good indeed as well, so no excuses!" I took all three bits of advice to heart and fell in love with the dish, so that when I came back home to the States, I was forlorn at the thought of not being able to enjoy it again until my return to Scotland! So I did some research and developed my own recipe to emulate the best Veggie Haggises as I remembered them looking, feeling and tasting. Many were skeptical (including Emily, who didn't really believe such a dish could be truly vegetarianized) and all were made believers, and since St. Andrew's Day was on Monday, I am pleased to bring this recipe to you!

I might also mention, the word "haggis" sounds hilarious with a Minnesota accent. "Hay-gis." Teeheeheehee :)

Let the Haggissing commence!


Dove Vegetarian Haggis
(With Neeps 'n' Tatties!)


Ingredients:
1 large white onion (diced)
1 large grated carrot
1 cup of minced mushrooms
2 cups dry green lentils
3 cups vegetable broth
1 can of kidney beans (rinsed, chopped)
1 cup of crushed/chopped nuts (walnuts, peanuts and hazelnuts are all good)
Juice of 1 lemon
1 tbs + thyme
2 tsp + rosemary
1 whallop cayenne powder (or half a seeded thai chili)
generous salt & pepper
1 cup steel cut oats
1 generous slug of Whisky
The heart, lungs and liver of a sheep (kidding! kidding!)

2 medium-large turnips
4 medium potatoes
butter
salt
milk

Materials:
Cutting boards and Knives
At least 1 large and 1 medium pot
Wooden spoon
9x13 baking pan
Masher
Kilt

Music Listened To:
The Thistle and Shamrock Celtic Christmas Ceilidh

Procedure:

1. Prep. Prepare all ingredients as listed. Generally the smaller you can cut things up the better. For the nuts, you may want to try putting them in a bag and bashing them with a rolling pin until they are in small, coarse bits. I recommend making your own veggie broth - I used leek greens and scallions seasoned with garlic, rosemary, thyme and bay leaves, although this takes a good couple hours.

2. Heat some butter or oil in a large pot and saute the onions for about five minutes.

3. Add the carrot, beans, nuts and mushrooms and continue sauteing for another five minutes. Add butter or oil as necessary.

4. Add the lentils and the broth. Bring to a boil and simmer 15 minutes. Add the seasonings once simmering (do NOT go easy on the seasonings, and do NOT stick your finger in your nose after chopping hot peppers FOR THE LOVE OF GOD!!)

5. Add the oatmeal and the whisky. Simmer another 15-20 minutes. Preheat the oven to 375 degrees.

6. Bake for 30-40 minutes. This is a good time to prepare the neeps and tatties! Peel and cube the turnips and potatoes and bring 2 pots of water to a boil. Boil the neeps for 15 minutes, the tatties for about 10. Drain and mash both, add butter salt and milk to the tatties to your preference.

7. Pipe in and serve! I personally use a ladle for the the haggis and an ice cream scoop on the neeps and tatties to get that nice rounded look.

I very much hope you enjoy this recipe (Burns night comes on January 25th!). Do note that this recipe yeilds a LOT of food, and it is quite filling, so, if ye're a wee weak Sassainach, feel free to half it. I personally will be enjoying it for lunch for probably almost a week! This last time I made it, it turned out the best it ever has - definitely don't take it easy on the seasonings, since they all bolster each other, producing that unique haggis taste.

Cheers!


Tuesday, November 24, 2009

Chimichangas Chez Boz

Hello my fellow chefs! Tonight I will reveal to you one of my favorite recipes, one which is sure to delight you and those with whom you share your living space. I learned how to make chimichangas from Megan and Jill Carle's excellent book College Cooking. This recipe is based off of theirs. It is also vegetarian, but you can make it carnivorous if you want, just sub out the can of beans and some cheese for a pound of ground beef or turkey. This recipe makes 9 chimichangas - 10 if you don't eat as much of the filling as I did before frying them. They're great to freeze. When you're ready to defrost just pop it in the oven until it's nice and crispy.

Chimichangas


Ingredients
4 cloves garlic
1 onion
1 bell pepper
1 160z jar salsa
10" tortillas (probably ten)
1 can refried beans (or make your own!)
1 can red/black/pinto beans (leave this out if you're using beef)
4 scallions, green ends removed and reserved for broth
~2 cups cheese
1 thai pepper (SEEDED.)
white pepper
salt
dash cumin
olive oil (if veggie, put a decent amount in the wok, if meat, just a dash, 'cause the beef makes its own nice oil as it cooks)
a lot of canola oil

Materials
Wok or equivalent sized skillet
Skillet or frying pan with a goodly sized rim
Knife/cutting board
Wooden spoon
Pincers
Paper towels

Soundtrack
Views from a Train by Richard Wylie, and Richard Goode playing Beethoven's Piano Sonatas Opp. 109-111. If you haven't heard those late sonatas, grab a copy and go listen RIGHT NOW! I don't care if you don't like classical music! This stuff rocks out.

1. Preparation Cut up onion and bell pepper into 1/4-1/2" chunks, finely chop the garlic, dice the scallions, and seed the thai or other spicy pepper. If you use a different pepper you may need to use more, or less, depending on the kind. One thai pepper was enough to make 9 chimichangas pleasantly spicy for us three. And may I emphasize, do remove the seeds or you will find your dish inedible!!!

2. The filling Put some olive oil in a wok, heat it up to medium-high and saute the garlic and spicy pepper for just a moment to let the flavors come out, then add the onion, green pepper, and scallions, and saute this for a bit until the onions are starting to get translucent, just a few minutes. If you are a carnivore, add the beef with the onion and green pepper and cook until the beef is brown. If you are not, add the drained can of beans, some salt and a dash of cumin, and some white pepper. I didn't keep track of how much white pepper I used, but it was a goodly bit. Just keep adding it to the filling at your leisure, until it tastes good. Though don't add too much of the pepper until the very end of this step. What you want to do now is cook the veggie/bean mixture until the onions and green pepper are soft enough to be appetizing, but not soggy, because that's lame. So keep tasting them. It should be maybe 7 or 8 minutes, with you stirring constantly to keep stuff from sticking to the bottom. When the veggies are cooked (or the beef is no longer pink anywhere), throw in your jar of salsa and let that cook for about a minute, then turn off the heat and add the refried beans and your cheese, and stir that around for a while until it's all mixed together. At this point, taste it and it probably will need some more salt, so go ahead and add that and any more white pepper if it needs it. You could also add more cumin if you wanted a more robust flavor. I figured it was already so heavy with the beans and cheese it didn't need any more fortification.


3. The chimichanga Go get out your tortillas and put about 3 large wooden spoonfuls of filling into each of them, then fold them over like the pros do and set them into a nice chimichanga pyramid. Your next step will be to fill a skillet with canola oil - you want a lake about 1/4" deep to fry these babies in. Heat the oil to just under high heat - I used a setting of 8 on a 1-9 burner scale. You probably shouldn't test it with water to see if it's hot enough, unless you want blazing hot canola oil spattering everywhere. Just wait a bit and feel the heat above it with the back of your hand. Then place in the first chimichanga. It should start sizzling nicely. Let it cook for about 2-3 minutes on each side, until it's nicely golden but not so much that it starts blackening. Turn it over with the tongs and be super careful not to let it splash down and spray oil on you. I did this once and got a nasty blister living on my thumb for a while. When it's done, take it out of the frying pan - I actually put two chimichangas in at one time because of the pan's size - and let it dry on a paper towel to get some of that grease out. When it's done drying, set it aside on your cutting board and while it's drying stick in some more chimichangas. Keep doing this until they're all nice and crispy.


And you're done! This goes nice with a little caesar salad to balance the heavy fried goodness of the chimichanga. Mm, very filling, and so tasty. Couldn't hurt to have a nice brown ale with it, too. Me, I just had some ginger ale because I was feeling a bit under the weather. Sabor!

Sunday, November 22, 2009

Lentil Shepherd's Pie

Howdy everybody!

Iain here today. With November in full swing and the weather getting... well it's not actually getting much colder at the moment (damn you global warming!!), but in any case, it's time for some cold weather, warm-you-up-on-the-inside dishes. This one is an old favorite (I think it's the old Scottish blood that keeps me coming back. I'm probably compensating for the fact that I have no sheep of my own to raise) that my family makes back home in Chicago with sage grown from our own back yard. Since I have depleted my supply of said sage, I got some from our friends Annika and Dakota, who have been farming and gardening like crazy down in Northfield, so yay them!

Lentil Shepherd's Pie

Ingredients:
4-8 medium potatoes (depending on potato size and how thick you want the potato layer)
2 cups dry green lentils
1 medium onion
At least1 tbs of crushed, dried sage
A healthy pinch of oregano
A pinch of cayenne
salt
milk
butter

Materials:
2 medium or large pots
wooden spoon
potato masher or fork
whisk
1 baking pan (about 9x13 works well)
rubber spatula
knife and cutting board

Music Listened To:
I think I had a Cherish the Ladies Pandora station going...


Step 1: Prep. Start by putting the lentils in a pot and submerging in water. Bring to a boil and simmer for an hour. Give them plenty of water to start with, but if they dry up halfway through, submerge them again. Once that's going, peel and chop the potatoes and start them boiling in the other pot. Leave them to boil for at least 10 minutes. In the meantime, dice the onion.


Step 2: Assemble. Preheat the oven to 350. The potatoes should be done before the lentils. Drain them and mash with salt, milk and butter to your preferences. The more butter, the better the top will brown. I also tend to whisk them for a little fluff. When the lentils are done, drain them and mash with the onion, sage, oregano, salt and cayenne. You don't want them to become a paste - just a little cohesive. Spread the lentils on the bottom of the pan. Spread the potatoes on top, being careful not to mix with the lentils or churn things up. A delicate touch is necessary here. If you have some cooking spray, spraying a little on the top can help browning as well.


Step 3: Bake. In the words of the great Jamie Oliver, whack it in the oven for 20 minutes. You don't really need anything but the onion to cook, per se, you just need everything to come together. At the end, turn the oven to broil and open the oven door to keep an eye on things. As soon as you see the top beginning to turn brown, pull it out (if you wait too long, it can go black in seconds). Serve up and enjoy!


You can modify this recipe however you like. I know some people really enjoy carrots and peas mixed in with their shepherd's pie. My housemates seem to think cheese is an appropirate ingredient, which just confuses me... Obviously, if you are a carnivore, feel free to make this with ground beef or lamb, which is the original way to do it, but don't turn up your nose at the way of the lentil! While I enjoy beef shepherd's pie from The Celtic Knot pub in Evanston, IL, I always opt for the lentils when I make it myself because of their amazing flavor. I recommend serving this with a green salad and a good ale. Good times! Cheers!

Monday, July 13, 2009

Vegetarian Tamales

Howdy all!
So here is my first food post. I hope you enjoy it!

Vegetarian Tamales
Ingredients:
5 ears of corn
1 canister of cornmeal
Lime Juice
Garlic Powder

Salt
1 can of frijoles negros (black beans)
6 Tomatillos
1 Onion
Cumin
Chili Powder
2 Jalapen
os
Cheddar Cheese

Kitchen Equipment
Knives
Cutting Boards
Skillet

Medium Bowl
1 can of frijoles negros (black beans)

Large Pot

Metal Caulinder
Pan for soaking

Music Listened To:
The Rough Guide to Irish Music

So Tamales are a pretty intimidating dish. That's why I'd never attempted them before now - everything I'd heard made them sound pretty difficult, and they're supposed to take forever to make.

BUT

It actually turned out to be pretty straight forwa rd. It all broke down into 3 basic steps of 1) prepare masa 2) prepare filling and 3) put masa and fillings in husks and steam for 2 hours. If I can make them, you bet your butt you can too.

Part I: Making Masa
So if you have a nearby place that will sell you true masa, go ahead and buy it and prepare it according to package directions. That is, if you want to be boring. The way I chose was far more amusing to me.

1. First of all, I shucked my five ears of corn, being careful not to tear the husks. Set these aside to soak in a pan, bowl or sink.


2. Cut the kernels away from the cob into a bowl. Be generous - every bit of corny goodness helps. The cobs can just be thrown away.

3. This is the part where I felt simply deranged. If you have a blender and want to be boring/sane, go ahead and use it. I, on the other hand, used the nearest available equipment, and bashed the hell out of the corn with a can of black beans. Aside from taking half an hour, it was actually quite fun. Don't waste your time pounding up and down, though, as fun as it is - pressing straight down and twisting the can back and forth to grind the kernels is much more effective. Do this until the kernels are barely recognizable as kernels.

4. There should be a fair amount of liquid in the bowl at this point. To make the consistency more masa-ish and to get rid of the liquid, start adding cornmeal and mixing it in. Keep adding it until you get something resembling the consistency of chunky peanut butter (probably about 2 cups of cornmeal, give or take).

5. Mix in some lime juice, a generous amount of salt (at least a teaspoon) and a generous amount of garlic powder. Congratulations, you now have masa fresher and yummier than anything you'd get in the store. Set it aside.


Part II: Making the Filling
The nice thing about making vegetarian tamales is that, since tamales are normally made with meat, there is no standard of what to put in them. Pick whatever veggies or cheeses you want. The important thing is to get plenty of cumin and chili powder in there. Being a fan of beans, tomatillos, onions and Jalapenos, I used those. If you prefer tomatos, avocados, bell peppers and Japanese eggplant, go ahead and use those.

1. Chop your veggies, grate your cheese, all that good stuff. Make sure to throw away the tomatillo husks - they aren't edible. If using hot peppers do NOT stick your finger in your nose after chopping. Seriously.


2. Start cooking the onion first, then add the tomatillos and beans. This stage of the process looks really pretty. Put in plenty of cumin (at least a tablespoon) and plenty of chili powder (at least two tablespoons). Stir in your cheese and Jalapenos towards the end. That's all for that section, folks!


Part III: Assembling and Steaming Tamales
Here's where things get fun (well, funner, at le
ast. It's hard to beat bashing the corn though...) Use the pictures as a guide.

1. Put your pot with a little water on the stove to boil.

2. Take a corn husk and hold it open in your palm. It should be nice and pliable after soaking. Take a few forkfuls of masa and spread it around th
e husk, leaving 1/3 of it on the right side clear, and probably only covering the bottom half of the husk. If it is a small husk, feel free to cover the whole thing and down the line use another small husk to finish the wrapping bit.


3. Take a light spoonfull of the filling and make a little trail of it down the center of the masa. If you put in too much, the tamale will be difficult to wrap shut. If you are Emily or generally sympathetic to her love of cheese, feel free to add some cheese on top of the filling.


4. Wrap the tamale into a cylinder, using the uncovered third of it to cover up any exposed masa or filling. There should be a little "tail" of husk that doesn't have any masa or filling in it. Bend the tail so that the tamale can sit upright. Set it in the caulinder vertically (most recipes call for a real steamer, but hell if I'm going to spend $40 on a pot and steamer so I can make tamales). Repeat steps 2-4 until you have as many tamales as you can fill.


5. Set the caulinder on the rim of the pot and leave the tamales to steam for 2 hours. Use this time to watch a bad movie, snuggle and/or make a side dish (we did spanish rice, you could also do rice and beans, or whatever you want, really).


And there you have it, folks! Veggie-friendly tamales! Definitely something to do when you have a few spare hours to do cooking - not just a weekday dish, but it's definitely worth the time. Enjoy!