Hey folks. I (Emily) was not about to get left out in the influx of new posts, so here we go. This was an endeavor Iain and I undertook back in August and just never got around to posting what with house hunting, new jobs, Fulbright Applications, etc. For the record, do not do this unless you have a lot of time open, like a Saturday or something. It's totally worth it though.
So, as you may remember, last summer I was the proud keeper of a backyard garden with a huge crop of basil. The result of this was a need, towards the end of the summer, to use up said basil. We made a ton of pesto and froze some leaves with oil in a jar, but even that didn't finish it off. Thus, we were left with the fortunate responsibility of using up the rest. In one of these endeavors, we decided to attempt homemade basil pasta.
Now, don't panic here. You've probably heard about hours and hours spent rolling paper thin sheets, cutting them up, and finding places for them to dry. And yeah, that's pretty legit, but ultimately it's less work than I thought it'd be, and it's also fun work.
Iain and I consulted a few sources when figuring out our recipe, but we ended up with a hodgepodge that I feel no guilt about posting up here. So, here's what ya need.
Ingredients
- several handfuls of fresh basil, chopped into small pieces
- one cup of flour per egg, more or less. I think we used four and four, and that made a ton of pasta.
- a pinch or two of salt
Pretty simple ingredients all in all, yes? If you don't have basil, you can use another herb or make it without, but the basil was pretty awesome. It's a summer thing though, I know, and pasta's good all year round. You could try it with spinach too, or even squash or something I bet. Anyway, off we go.
Procedure
- Pour the flour out onto the counter. You need a big counter space for this, both for mixing and rolling. If you don't have one, you might want to consider using a table instead.
- Push all the flour into a big mound and make a little well in the center by scooping some of the flour out and mounting it on the sides.

- Crack the eggs into the well. Well, don't crack them into the well. Crack them on the counter and open them into the well. Be careful so as not to breach the walls. It should look something like this:

- Carefully beat the eggs a bit with a fork, then start to incorporate some of the flour around them. Continue doing this, slowly in order to avoid breaking the walls, until the flour and eggs become a cohesive mass. You can add the basil when it feels manageable, like it won't make mixing impossible or just get all over the floor. For me, I think that was about halfway through. If you really feel like making green pasta, you can mix the flour and basil in the food processor, but I like the little green flecks better than I think I would a green noodle. However, if you're using squash or something, you'll definitely want to the use the food processor method. If you need to, add a bit of water or flour to get to the right texture. It shouldn't be so sticky that it's sticking to your hands, but you'll add flour during the rolling process, so it shouldn't feel dry either. Something like this.
- Now, this is the fun part if you're like Iain and enjoy rolling things out. For me, this is the not-so-fun part. But it's still worth it. Split the dough into manageable chunks (I t
 hink we did four, but it depends on the size of your rolling pin and counter space) and start rolling. This will take awhile. You need to get it pretty darn thin-- something in the realm of 1/8 inch. It depends on what pasta shape you're making. Of course, if you have a pasta machine, that takes care of it, but being poor and mobile, we do not. Go generous with the flour, both on the rolling surface and the rolling pin. Sticky pasta is sad pasta. It should look like this when it's done.
- This next bit is the fun part for me, because you get to shape it. We decided to do about half linguine/fettuccini (depending on how thick our strips were) and half farfa
 lle. There are a few ways to make strip-style pastas. One is to take each bit of rolled out dough and just slice it into strips. Some will be longer than others, but don't worry about it. If memory serves me correctly, this was Iain's preferred method. I liked the jelly roll method myself. Basically, take a piece of rolled out dough and roll it tightly lengthwise or widthwise, depending on how long you want your pasta. Then cut off strips about 1/8-1/4 inch thick and unroll them into pasta. It won't look perfect, but it works.
For the f arfalle, cut pasta into little rectangles about 1 in x 2 in and pinch the middle of each together with thumb and forefinger to form the bow ties. You won't be able to use all of each pasta sheet for this shape, since you need the rectangles for it to work, so make the edges into short linguine or something.
- Now it's drying time. For the farfalle, baskets work really well, but we didn't have any, so we just left them on plates in single layers. For the linguine, coat hangers worked surprisingly well,although we had to be careful when centering the noodles on so they wouldn't fall right off. We let the noodles dry for perhaps three or four hours, and that seemed sufficient. The farfalle kept in an airtight container for a few days beyond that. It might have been good for longer, but we didn't want to take the risk, so we ate it.
That evening, it was show time. We put up a pot of water to boil and got started on a simple sauce. The chances of us ever buying tomato sauce again are nil to none, because canned tomatoes work so well. We threw a can of diced ones into a saucepan with some diced up onion, garlic, dried oregano, more fresh basil, olive oil, and crushed red pepper, let it simmer up for a bit, and voila-- cheap and awesome sauce.
Fresh pasta only takes about five minutes to boil, or at least ours did. The coat hanger linguine took a bit of maneuvering to get into the water, since it was bent in half, but we got it without much, if any, breakage. However, if you plan to gift the fresh pasta before it's cooked, you might want to dry it on something that will allow it to stay straight. I've heard towels work well.
And there you have it. Fresh, homemade pasta and tomato sauce. The stuff is filling too. It's so eggy! So make it when you get the chance, and happy Halloween to all!! (I'm gonna be a Jedi).


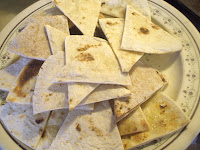 Prep the tortillas-- lightly oil a baking tray, place the tortillas on it (this may take two batches) and turn to coat. Sprinkle the wedges lightly with cumin, garlic powder, grated cheese, or a combination.