Monday, May 17, 2010

Very Very Special Occasion Chocolate Raspberry Cake

Well, what can I say? Iain's 23rd birthday was a little over a week ago, and I (Emily) know that chocolate with berries is his favorite kind of cake. Each year for the last three I've sorta tried to out-do my previous chocolate-and-berry cake, and this year I think I took it as far as I ever will. I won't say that this is the best cake I've ever had. Cakes, like brownies, come in many forms, and thus cannot be stacked up against each other as though all of the same make. However, I will say that when it comes to rich, chocolaty cakes, this one was quite excellent, and I had a really fun time making (and decorating, and serving, and eating) it.

This recipe comes in 5 parts: cake, filling, raspberry-cream, ganache, and assembly. I didn't photograph each section as well as I might have, but hopefully there will be enough guidance for all. Not including chill time, the whole thing took about 3 hours to put together (I think). Do it on a day where you've got time, and do let the whole thing chill in the fridge for an hour+ (as long as you want, really), so the chocolate firms up nicely.


Chocolate Raspberry Cake

Ingredients (for a 2-layer cake)
  • 2 cups flour (pastry would be ideal, but I used all-purpose)
  • 1 tsp. baking soda
  • 1/4 tsp salt
  • 2/3 cup cocoa powder
  • 2/3 cup hot water
  • 2/3 cup lukewarm milk
  • 1 1/4 sticks (10 TBS) unsalted butter, softened and cut into pieces
  • 1 1/2-3/4 cup sugar
  • 1 1/4 tsp vanilla extract
  • 3 large eggs, left out on the counter for a bit
  • 1/2 cup chocolate chips
  • about 1/3 cup frozen strawberries, left out for 10 minutes and smashed with a fork
  • about 30 raspberries (fresh or frozen), reserved for decoration
Procedure
  • Pre-heat the oven to 350°F and grease two 9" round cake pans (or 8 or 10 if you don't have 9s. Your layers will be taller or shorter accordingly). Line with wax paper, then grease the paper.
  • Whisk the flour, baking soda, and salt together in a medium bowl.
  • Whisk the cocoa and hot water in a small bowl, then whisk in the milk.
  • In a large bowl, beat the butter until very creamy (this will take a few minutes if you're doing it by hand). Gradually stir in the sugar and beat 'till light and fluffy, then add the vanilla. Beat in the eggs one at a time.
  • Add 1/3 of the flour mixture to the butter mix, stirring well. Follow with 1/2 of the cocoa mixture, another 1/3 of the flour, the rest of the cocoa, and the rest of the flour. Stir slowly after each addition until it's incorporated.
  • Stir in the chocolate chips and raspberries
  • Pour half of the batter into each pan and smooth with a spatula. Bake for 30-35 minutes until a toothpick comes out with a few crumbs.
  • Cool in the pans for 10 minutes, then transfer to a rack. Let them cool for a good long while before trying to frost. (That was a mistake I made. Oops!)
Chocolate-Cream Cheese Filling
Ingredients
  • one 3-4 oz. bar milk chocolate, broken into pieces
  • 4-5 oz. dark chocolate (I used Green and Black bars for both. Great success, highly recommended), broken into pieces
  • 1/2 stick butter (four TBS), softened
  • 4 oz. cream cheese (or light cream cheese)
  • 1 tsp. vanilla
Procedure
  • Using the double boiler method (for a how-to, check out the bonus brownie recipe here), melt the chocolates together. Cool for a bit.
  • Stir the butter and cream cheese together until it's all one big mass, then add the vanilla. Mix in the chocolate once it's cooled for 10+ minutes. If the filling seems too liquidy, you can add a bit of milk or more melted chocolate. If it's too chocolaty, you can add more butter.
Raspberry Cream
Ingredients
  • 1-2 TBS heavy cream
  • about 3/4 cup- 1 cup frozen raspberries (if you're using a bag, whatever's left after the cake and the 30 for the top), left to thaw for 10 minutes
Procedure
  • On a large plate, mash the raspberries with a fork. Stir in the cream. The raspberries will still be very lumpy and not very creamy, but this is a good thing.


Chocolate Ganache
Ingredients
  • 1 TBS butter
  • 1/2 cup heavy cream
  • 5 oz. dark chocolate, chopped. This can be a bar or a
Procedure
  • Combine the bream and butter in a small pot and heat gently to just below scalding point (which is where there are little bubbles popping up around the edge and it steams).
  • Place the chocolate in a heat-safe pan (a pie pan works well) and cover with the heated cream. Leave the chocolate to melt for a few minutes, then stir until smooth. If it seems to be not melty enough after several minutes, you can place that pan onto the double boiler and heat briefly.
Assembly!!

Here comes the fun part. I mean this in both the sarcastic and genuine senses-- sarcastic because the assembly is complicated, genuine because it really is quite enjoyable to see it all come together. Again, sorry I don't have more pictures. I'll explain the best I can.

  • First off, you need to cut one of the cake layers in half to form two thin layers. If I had good advice for how best to do this, I'd share it. As it is, I basically did just saw through a layer with my good knife. It crumbled a little but there's enough stuff on each layer to stick it all together again.
  • Place the bottom half off the split layer on a large plate suitable for decorating. Carefully spread a thick layer of the cream cheese filling on top. I found it best to warm the filling briefly so it was a bit more spreadable.
  • Place the top half of the split layer, rounded side down, on top of the filling. Spoon the raspberry cream on top.
  • Place the unsplit layer on top of the raspberry cream.
  • Now, using a knife or a spatula (whichever is easy for you) very carefully spread a thick layer of filling over the top layer, smoothing it as much as possible. Fill in the sides where the layers meet. Again, feel free to warm the filling slightly if it's too difficult to spread on its own. You might not use all of the filling, and the same is true of the ganache.
  • Spoon ganache gently over the filling and use a spatula to smooth the top and sides. Use a spoon or paper towel to mop up the ganache that gathers at the bottom of the plate, especially if it seems in danger of escaping the edges.
  • Dip the reserved raspberries in the remaining ganache and place around the cake. It's important to do this relatively quickly before the ganache hardens.
  • Place the cake in the fridge for at least one hour to set and serve. No ice cream required.


Saturday, May 8, 2010

Babka

Shabbat Shalom! Having just read the title of this post, you are probably either salivating or scratching your head in confusion. If you're among the former, read on! I'm amazed by this recipe. It's AWESOME. If, however, "babka" looks to you like a made-up word, I (Emily) will tell you that it is a yeasted Lithuanian coffee cake. Its basic idea is sorta like a giant cinnamon roll, with a sweet filling in the middle of a sweet roll. But it is so much better than your basic sweet roll. As testament, I will point to the fact that I took the babka out of the oven around 10:30 PM on Thursday. At 8:30 PM on Friday, it was history.

I found this recipe in a great book called A Blessing of Bread: Recipes and Rituals, Memories and Mitzvahs--The Many Rich Traditions of Jewish Bread Baking Around the World. I slightly adapted the recipe for my own use, so I feel no guilt posting this, but I highly recommend the book. It's great for Jews and goyim alike (and if you have no idea what goyim are, that means you're one of them.)

I didn't actually take any pictures of the baking process (sorry!), so the finished product will have to suffice. Also, make this on a day when you have a lot of time around the house, because although there's not a ton of hands-on time, the total process takes 5-7 hours. And don't be intimidated by the length of the recipe; it's really quite simple. It just takes lots of explanation.

Babka
Ingredients (for 1 loaf/roll)
  • 4 TBS butter, softened (half a stick)
  • 3/4 milk (I used 1%, but anything should work. The higher the fat content, the richer the bread)
  • 1 TBS yeast
  • about 2 1/2- 3 cups all-purpose flour (white)
  • 1/2 tsp cinnamon, or 1/2 cinnamon stick, pulverized in a mortar and pestle (I tried this. it took forever, but it was fun, and the flavor was great. The picture's from about halfway through the process).
  • 1/2 cup sugar
  • 1-2 tsp. vanilla
  • 1 1/2 egg yolks (I know this sounds impossible, but since you need an egg glaze for the top it actually works out well. Crack an egg into a bowl and use a utensil, or your fingers, to break the yolk in half. Leave the other half of the yolk, along with the white, in the bowl, and refrigerate 'til needed for the glaze)
  • For the filling, use 1/2 cup sugar, 2 tsp. cinnamon sugar, 3 TBS cocoa powder, 3 TBS butter, and 1/2 cup each raisins and chocolate chips (optional but highly recommended)
Procedure
  • Scald the milk by pouring it into a microwave-safe container and heating on high until it's steaming and little bubbles form around the edges. Let it cool until it's about the temperature of a warm bath.
  • In a large bowl, whisk the yeast and 3/4 cup of the flour together. Once the milk is cool enough, whisk it in 'til it's smooth. Now let it sit for 10-20 minutes. It'll get bubbly and very puffy. (If you're grinding your own cinnamon, this is a good time to do it.)
  • Mix the cinnamon and the sugar together and set aside 2 tsp. for the filling. Whisk the rest, along with the egg yolks and vanilla, into the yeast mix.
  • Add the rest of the flour, along with the butter (I found it easiest to chop the butter up a bit first). Mix 'till incorporated, then turn onto a lightly floured counter to knead (you won't need a lot of flour, most likely). It will be very soft and easy to knead, but keep going until it's smooth and even more elasticky, about 8-10 minutes. For instructions on how to knead, see this post.
  • Place in a clean bowl (which shouldn't need oil, since the bread is so oily), cover with plastic wrap and a towel, and let rise until doubled in volume. This will take 2- 2 1/2 hours, probably.
  • Just before shaping the loaves, make the filling by whisking the sugar, cinnamon sugar, and cocoa together in a medium bowl. Add the melted (and cooled) butter and whisk some more until smooth.
  • There are multiple ways to shape a babka loaf, but all of them involve spreading the filling around the middle of the dough and rolling it up like a carpet. For a loaf that resembles a thick, stout baguette roll the dough out into a rectangle-like shape about 1/4 inch thick. For the pinwheel-like shape I made, roll it into a circle-like shape about 1/8 inch thick.
  • If you're making the rectangle loaf, spread the filling over the whole surface of the dough, leaving a 1/2 inch border around the sides. If you're making the pinwheel, cut the circle in half and spread half of the filling on each piece, leaving the 1/2 inch border. (Whew. That's a lot of halves.) I found it easiest to use my hands for this, but you could try with a spatula. If the filling is too stiff, microwave it very briefly to soften it.
  • Sprinkle the raisins and chocolate chips on top of the filling. You could also add some nuts here, but I'm not a big fan.
  • This is the carpet rolling part. For the rectangle, take one of the long ends and loosely (gently) roll up the dough. For the pinwheel, roll each piece, loosely and gently, like a carpet, starting from the rounded edge and working towards the cut edge. You should have two thick snake-like rolls.
  • Once it's rolled, the dough should be soft enough that you can pinch the edge of the roll into itself, thus sealing it. Use a little water if you need to. Once it's sealed, press your hands lightly along the length of the roll, starting from the center and working towards the end, to eliminate air bubbles. Then pinch the ends together to seal them. Make sure they're tight!
  • For the rectangle, place seam-side down on a greased baking sheet.
  • For the pinwheel, your work is not done. Roll each snake-like piece around so that the middle gets thicker than the ends. The longer you can make these pieces, the prettier the pinwheel, but I didn't try that hard. Bending one piece in half, loop the middle over a chopstick (or something similar). Get a boyfriend (or whoever you happen to have about) to hold the chopstick and starting passing the two ends of the snake over and over each other so twists form. Don't tug the dough too hard! If you only get a few twists (like me) that's ok. Pull the chopstick out of the center and repeat with the other half. Then shape both pieces into "C" shapes. Set one of the pieces into a greased round baking pan and use the other to fill the middle of the first "C" and curve around the outside. If that's confusing, let me know in the comments and I'll try to clarify.
  • Now comes the waiting again. Cover the loaf with plastic wrap and the towel and let it sit for 2 1/2 hours, letting it rise.
  • Before baking, preheat the oven to 300°F and beat the egg you put in the fridge with a pinch of salt. (See, I told you it'd be useful!) Using a pastry brush, or a spatula if you don't have one, glaze the bread with the egg wash. If you don't use it all that's fine.
  • Bake for 50-60 minutes, turning the pan after 40 or so so it browns evenly. When the dough springs back when touched and the crust is a rich golden brown, it's done.
  • Let the loaf cool in the pan/on the tray for 10 minutes, then let finish cooling on a rack as long as you can stand to wait.

Friday, May 7, 2010

Lentil-Rice Pilaf and Vegetable Stew

Good morning (and good rainy morning, if you're in the Twin Cities).

If you're feeling chilly and want some cozy comfort food, this will do the trick. Both recipes are easy to prepare and delicious (and can be made simultaneously). I (Emily) am not feeling very wordy at the moment (rain makes me sleepy), so I think I'll just start typing up the recipes now. As usual, feel free to change up the veggies and proportions. Enjoy, all!


Lentil-Rice Pilaf
Ingredients
  • 1/2 cup lentils, rinsed
  • 2 TBS oil (olive or canola) or butter
  • 1-2 minced cloves garlic
  • 1/2 tsp. cumin seeds (or you can sub some ground cumin, but the seeds are great)
  • 1 cup brown rice
  • 2 cups veggie broth (or water, if you don't have any)
  • salt and pepper to taste
Procedure
  • Heat the butter or oil in a medium pot over low heat
  • Add the cumin seeds, turning the heat up briefly, and sizzle until they blacken (about a minute).
  • Turn back down to low and add the garlic, cooking for a minute more
  • Add the lentils and rice and stir until coated
  • Still in the broth and the salt and pepper, bring to a boil, cover, and cook as you would rice until all the water is absorbed. (I forgot to take a picture. Sorry!)
Vegetable Stew
Ingredients
  • oil for the pan
  • one medium onion, diced (I used half a red and half a white because that's what we had, but use whatever you like)
  • one large carrot, chopped
  • one 15 oz. can chickpeas (or the equivalent amount of dried chickpeas, soaked overnight)
  • half of a large eggplant, or a whole small eggplant, sliced into rounds and then chopped
  • a handful or two of frozen peas
  • one handful parsley, chopped
  • 1 cup veggie broth
  • 1 TBS tomato paste
  • 1 clove garlic, sliced thinly or minced
  • a pinch of hyssop (can be omitted if you don't have any)
  • dash cinnamon
  • dash lemon juice
  • 1 TBS butter, to thicken
  • salt and pepper to taste
  • chopped almonds, to garnish
Procedure
  • Prep the eggplant: Stewing the eggplant along with everything else would likely work, but I find baked eggplant to be less chancy. So chop as directed (or however you like, really) and place on an oiled baking tray. Turn the eggplant pieces to coat in the oil and sprinkle with salt and pepper. Broil for a minute or two a side, until nicely browned. Watch them very carefully or you will have a load of pitch-black charred eggplant on your hands.
  • Oil a medium-large skillet and heat.
  • Add the onion and cook over medium-low heat for a few minutes until softened before adding the carrot and turning up to medium.
  • When the carrots are getting soft, add the parsley and chickpeas, along with the garlic. Stir for a moment, then add the broth. Allow to simmer for a few minutes, adding the tomato paste and other spices.
  • After a few minutes, stir in the peas. As the stew bubbles and the broth is absorbed, gradually stir in little pieces of butter to thicken. When the stew is bubbly and gooey but not exactly soupy, it's done!
Scoop some pilaf into a plate or bowl and top with stew. Garnish with almonds and serve warm. Mmm-mmm.

Sunday, May 2, 2010

Yummies for Breakfast - Taters and Curried Eggs

Howdy there. Despite my relatively busy schedule, I (Iain) am determined to make up for my dearth of posting during March and most of April by posting a lot right now. So now I think I bring you one of my specialties, perfected by repetition: eggs and potatoes for breakfast. And yes, I know I've been posting a lot of potatoey posts lately - that'll change, but for now enjoy them!

Breakfast Taters

Ingredients
5 potatoes
1 large white onion

4 cloves garlic

About a tablespoon of canola oil

Seasonings (see variations below)

Salt

Black Pepper


Music Listened To:
Matt Molloy's most excellent album, The Stony Steps

Procedure:

1. Prep the potatoes: cut into a shape of your choice. My favorite one is almost certainly the 1/2 in by 1/2 in square-ish shape (about 1/8 thick). Other favorites are the 1/8 in by 1/2 in strip and the disc (possibly the easiest to cut, and works well if your dealing with small potatoes). Also dice the onion and mince the garlic.


2. Heat the oil in a skillet and add the onion. Saute for a minute, then go ahead and add the potatoes with about a clove of the garlic. Add salt and pepper. Set the heat to medium. Stir occasionally and cook for about 15-20 minutes until the potatoes start getting soft.

3. Add your seasonings from the set of options below:

The Classic: Rosemary! Simple, yet delicious, and it goes well with the garlic.
The Red Classic: Like above, except add a good couple teaspoons of paprika before taking the potatoes off the heat.
Scarborough Faire: Parsley, sage, rosemary and thyme. Hehehe.
Illegal in Arizona: Bad joke. Cumin, chili powder and either a diced red chili or cayenne powder.
Curried: Instead of oil in step one, use butter and add a teaspoon of turmeric before you add anything else. When you get to this stage, add curry powder and either a diced red chili or cayenne.


4. Time to make them crispy! Some recipes will tell you to make the potatoes crispy at the beginning and then cook them through. What I find is that this makes the potatoes generally soggy and un-crispified. That's why now, once the potatoes are already edible, we crank up the heat to maximum, add a little extra oil and get ready to scream "shut up!" at your smoke detector if it's as over-sensitive as ours. Start stirring nearly constantly. All the moist residue on the outside of the potatoes should start to evaporate and the outsides should start to brown. When most of the potatoes have been browned, you're good! Serve em up!


Curried Eggs

The process for this is rather simple, but I still wanted to share it with you. Heat some butter in your skillet and add to it a few shakes of turmeric and a couple shakes of curry powder. Spread the turmeric butter around so that the butter turns a bright orange or yellow. Crack your eggs into the skillet and immediately shake some salt, pepper and a couple more shakes of curry powder. Once the whites start to solidify on the top, flip the eggs and cook either just a second (over easy), for about 20-40 seconds (over medium, oh yes, that elusive over medium) or a good minute or two (over well). Serve em up!

Saturday, May 1, 2010

Mexican Suns! (with baked tortilla chips)

Ok, so maybe these aren't authentically Mexican. Having never been to Mexico, I (Emily) don't know much about what authentic Mexican food is. However, these taste good, come together quickly and easily, and look like suns when they're done.

This dinner resulted from Iain getting home from work, exhausted, after a 10 mile (mostly uphill) bike ride. I, having been home from work for several hours already, was excited to cook. So I decided to play around in the kitchen while Iain showered and woke up a bit. The Mexican food resulted from the fact that Iain decided to buy tomatillos and other delicious things at the co-op this week, and I happened to have frozen corn.

Don't be intimidated by the relatively long ingredient list, as the veggies can be easily subbed in and out for each other and proportions easily adjusted.

Mexican Suns!

Ingredients
  • dash vegetable oil
  • dashes of cumin, chili powder, and garlic powder (adjust to taste)
  • 1 tomatillo, cut into small chunks or slices (feel free to use 2 if you've got them
  • half an onion (I used red-- yellow or white would work too, I'm sure)
  • 1-2 TBS tomato paste
  • 1 canned chipotle pepper in sauce, chopped really small
  • 1/2 green pepper, in small chunks
  • 1 can beans, rinsed and drained (I used a mix of kidney, pinto, and black. Use whatever you've got)
  • 1/2 bag frozen corn
  • 1/2 yellow pepper, in small chunks
  • 1 tomato, sliced or diced
  • 1/2 c. grated cheddar or jack cheese
  • bunch of cilantro, chopped
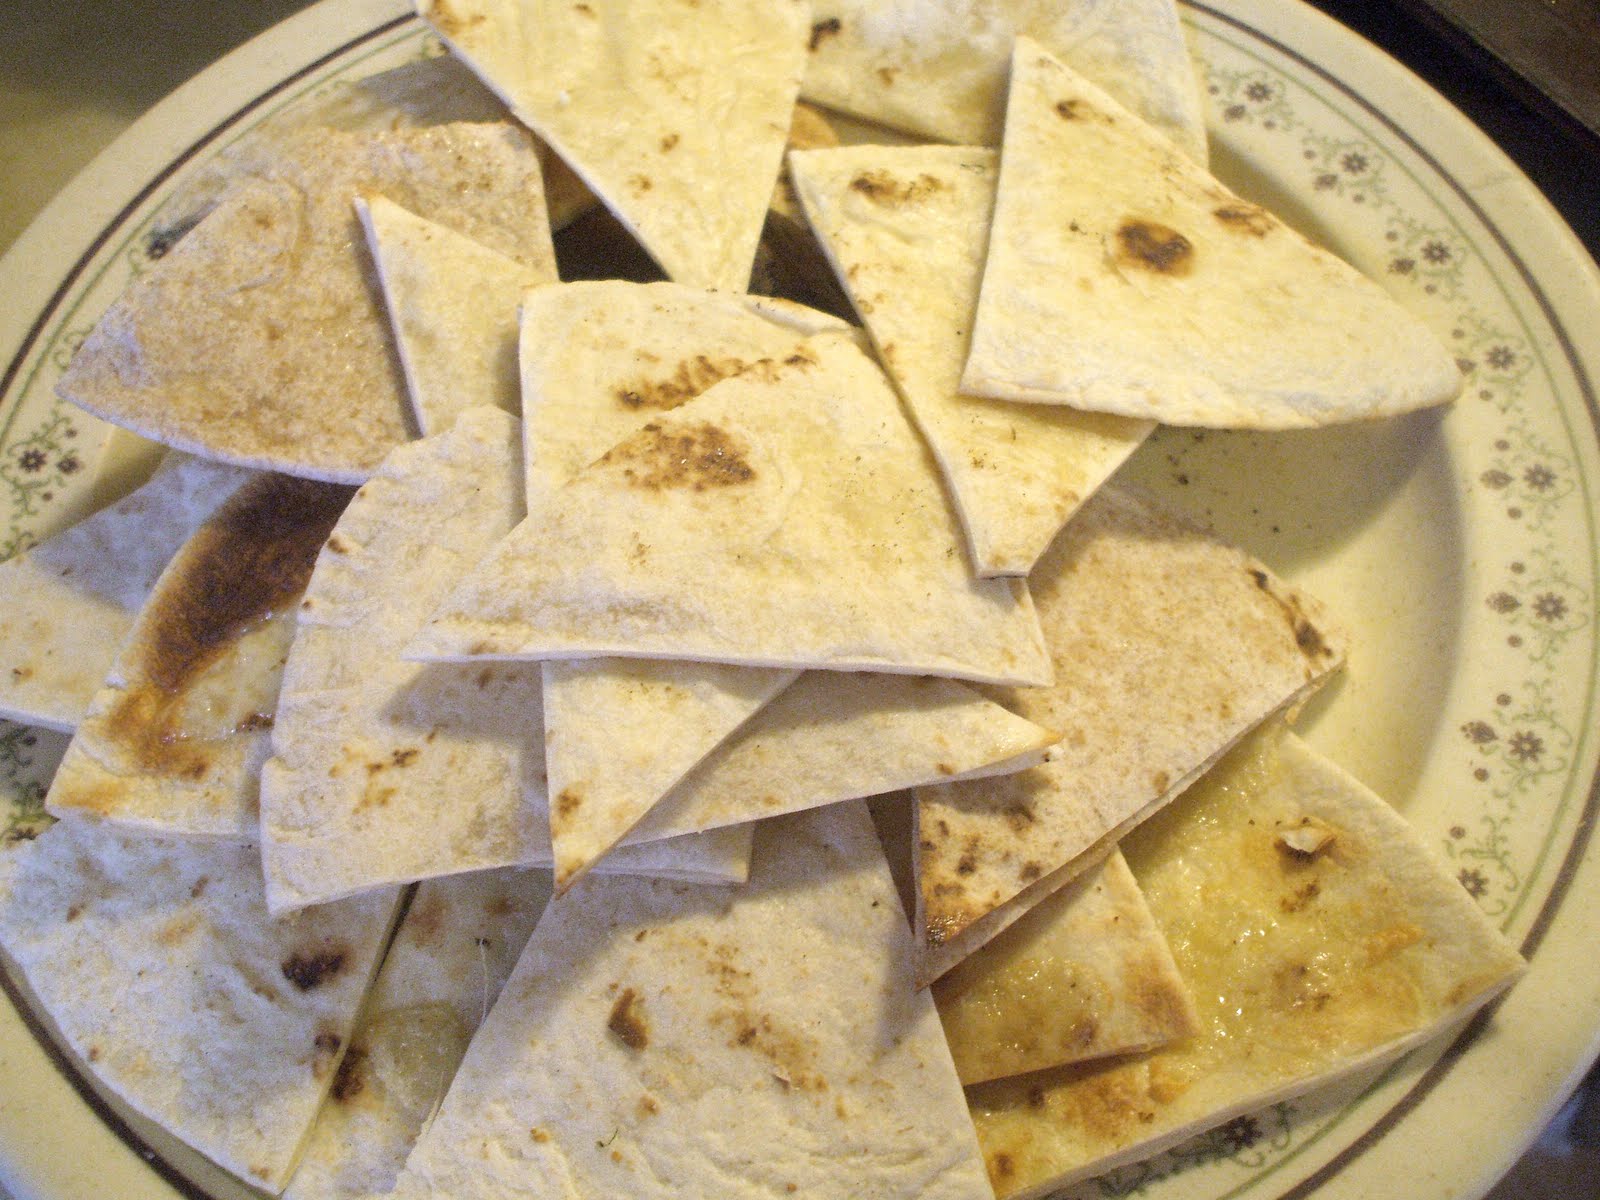
  • 3-4 flour tortillas, sliced into 6-8 wedges

Procedure
  • Prep the tortillas-- lightly oil a baking tray, place the tortillas on it (this may take two batches) and turn to coat. Sprinkle the wedges lightly with cumin, garlic powder, grated cheese, or a combination.
  • Heat the vegetable oil and toss in a little cumin, garlic powder, and chili powder. Add the onion and saute over medium heat for a few minutes, until it grows translucent.
  • Add the tomatillo. Cook over medium for a few minutes, then turn up to high for a minute or so in order to slightly brown the outsides. Turn back down to medium.
  • Stir in the chipotle pepper, tomato paste, and green pepper. (I also like to add a little of the cilantro here.) Cook over medium for a few minutes, until the pepper is starting to soften.
  • Add the corn, beans, and more of the cilantro, reserving a bit for the end. Add more cumin, chili powder, and garlic powder if desired.
  • Once everything is heated through, remove from heat and stir in the tomato, yellow pepper, reserved cilantro, and some of the cheese.
  • Broil the tortilla wedges for 1-3 minutes. Watch very carefully or they will burn.
  • Serve, preferably in the shape of a sun, with bean mix in the middle (topped by more cheese) and wedges around the outside.

Sunday, April 25, 2010

Sloppy Bozzies

Good evening! I would like to share with you tonight, or today, depending on your time zone, a childhood favorite of mine adapted for the particular circumstance of Iain and I being both under pacts of vegeterianism and, for him, an abstinence from high fructose corn syrup. Thuswise, this dish became an experiment for me in slow-cooking a hearty and manly all-vegetable dish. For these were the days of the MAN HOUSE, when Emily had left and we had yet to reconvene the Boshenke household in Chicago.

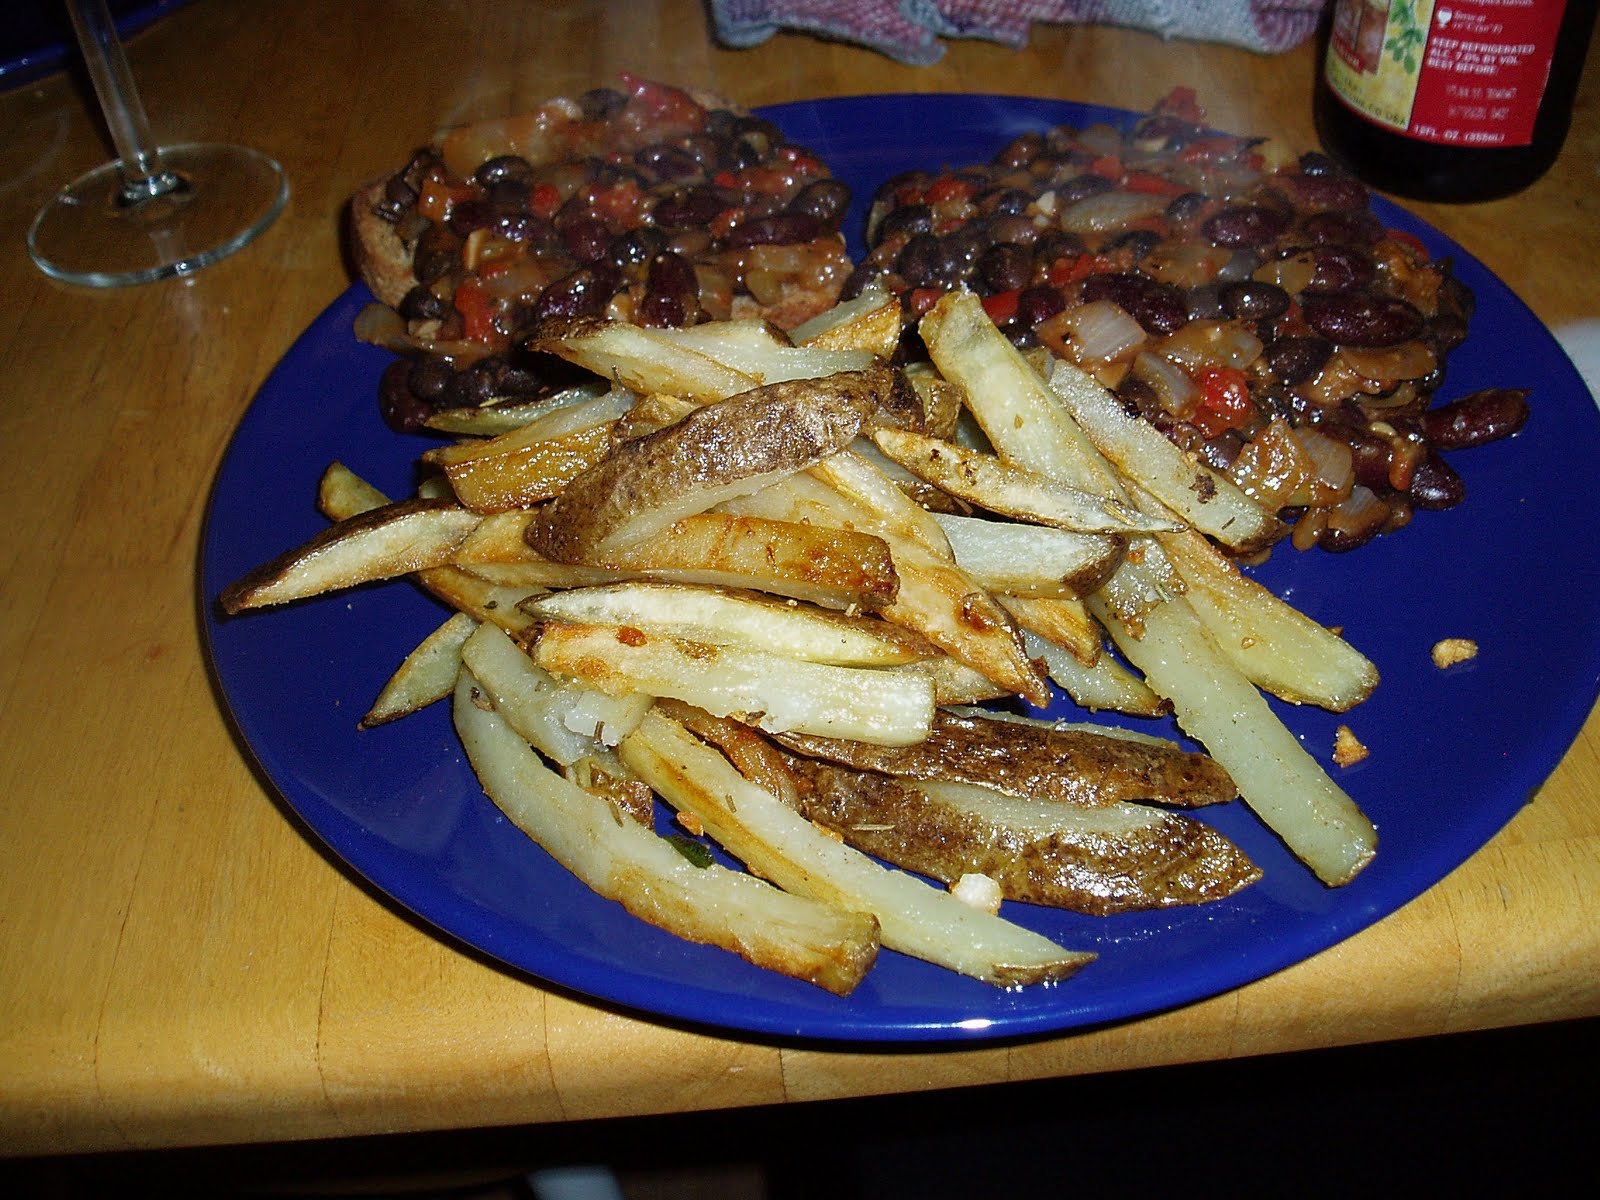
Iain taking over the keyboard for a minute here. This dish was a really fun collaboration, and I might actually say I enjoy it more than the original! My main contribution aside from sous chef/consultant was the pan-fried french fries, which is a lovely side I recommend coupling many-a-dish with. These are pretty different from the chips of my fish and chips recipe, so ready your taste buds!

Sloppy Bozzies

Ingredients
3 Tablespoons veggie oil
2 celery ribs
1 onion
1 bell pepper
6 garlic cloves
4 cups red and black beans
1 teaspoon thyme
1 teaspoon cumin
salt and pepper
1 Thai pepper
1/2 cup beer
1/2 cup ketchup (OH NO!! Iain had lenten vows of no high fructose corn syrup, and our ketchup had it in it. Here's what we substituted: 1 tomato diced, 1-2 tsp cider vinegar, several glubs Worchester, 2 Tablespoons corn meal, 1 Tablespoon tomato paste)

Music: Green Day, hehe

Procedure.


1. Finely dice celery, onion, and bell pepper, and garlic.
2. Cook over medium heat in an oiled wok or large skillet: onion, peppers, garlic, celery, beans, and salt and pepper! Have this going for 10-15 minutes, until onions are softened and nicely translucent.
3. Add beer, Worchester, and ketchup (or ketchup substitute mixture). Partially cover and simmer for 15 or so minutes, but if you have longer, let the heat be lower and cook it for longer. I think this dish would be even nicer if it had more time to soak in the flavor.

Pan-fried Garlicky Fries
Ingredients
About 1 1/2 russet potatoes per devourer (or 2 if the devourers are bottomless pits)
About as many cloves of garlic as there are potatoes
A couple sprigs worth of rosemary
About 3/4 cup canola oil (for 4 potatoes)
salt

Procedure:

1. Alright ladies and gents, the key to making these fries with maximum deliciousity is to properly season your oil first. About 1-2 hours before you begin frying, put your oil in a jar and add the garlic (minced) and rosemary (broken if fresh) and let it sit. Once in a while it helps to stir it, but the main idea is to let the oil soak up the garlicky and rosemary-y juices.

2. Proper fries procedure! This step is nearly identical to the chips of my fish and chips recipe. Cut up your potatoes into whatever shape you want and let them soak in a bowl of cold water for about ten minutes. Once the time is up, drain em and dry em!

3. Skillet time! Pour about a half cup of your oil into your skillet and set it to high heat. Make sure NOT to put in your garlic and rosemary with the oil - you do yourself no favors by burning these tasty morsels to a crisp! Add about 2 potatoes worth of the fries to the oil and let them sizzle! Keep a close eye on them, and check their undersides frequently. Once they're starting to turn a crispy golden brown, flip them using a spatula or your preferred flipping utensil. Let them go another few minutes, adding some garlic and rosemary right before you're ready to take them out.


4. THEY'RE BROWNED! TAKE THEM OUT!! TAKE THEM OUT!! Phew, that was close - that one looks a little blackened. Good thing you have me to keep an eye on you. Place them in a bowl or on a plate with a paper towel to absorb the runoff oil. Put the place somewhere warm, like inside an oven set to warm, perhaps. Add the rest of your oil and fry up the second batch. These will go faster than the first, so be ready to flip them faster, but still follow the same general procedure as above.


5. Aaaannd, that's it! You're done! Serve them up with some sloppy bozzies and enjoy!


I hope you enjoyed our joint post this evening (it was afternoon when we started it) as much as we enjoyed cooking it. Well, I guess that'll only happen if you cook it. So cook it! Tada! I'm hungry - I'm going to go make food now. Tata!

Sunday, April 18, 2010

Beans & Rice

Hello everybody,

So, I (Iain) just flipped through the recent Yummies! posts and found that the last time I posted an actual recipe was in... February. Sad. Although I did participate in cooking many of the recent featured dishes. But still, the most recent post I did was a collaborative April fools dada extravaganza, so I'm here to fix that, by posting an EXTREMELY MINDBLOWINGLY DIFFICULT DISH TO MAKE.

So, ladies and gentlefolk, I give to you...

Beans and Rice - Boshenke Style


Ingredients
Beans
Rice

Procedure
Make beans and rice.

Tada!

Okay, for real this time...

Ingredients
1 cup uncooked brown rice (white works too)

2 14.5 oz cans of beans (I like to go with one black, one red)
1 can diced tomatoes
3 or 4 cloves garlic
garlic powder
cumin
chili powder
salt
black pepper
1 tbs olive oil

Optional Ingredients
1/4 to 1/2 white onion, diced
1 red chili, diced
ground coriander
a pinch of oregano
1 green pepper, diced
cheese

Music Listened To
Good lord this was long ago. I'm going to guess... Rodrigo y Gabriela

Procedure

1. Cook the rice (if you don't know how, you boil the 1 cup of rice in just over 2 cups of water in a covered pot).

2. Heat the olive oil in the skillet. If you're using onions, toss them in first to let them soften. Once that's done (or if you're skipping that), put in the beans, preferably drained. The main idea is just to let them heat through, so you don't need to heat them alone for long. Add the garlic and other seasonings and stir them in (choose your own proportions!). Let it simmer to let the flavors meld.

3. If you're using green pepper, go ahead and add it now. Once it's absorbed the water, add the rice and stir it in. Lastly add the tomatoes and let the whole thing heat through. Adjust seasonings as necessary.

4. Serve up in a big bowl and top with grated cheese (right now we have some habanero jack from the coop - intense!)


And that's really all there is to it. You can make this dish super simple, or actually kind of extravagant. It's cheap, delicious and very filling, and usually you get at least one or two good lunches out of the leftovers. Perfect Americorps food, in fact...

Thanks, and see you in like a month and a half!

(Joking)

(I hope)